Sometimes you start a project for the experience, and you hope in the end that it is a good experience. This was the attitude I started with when I decided to build FAI and Half A props. Little did I know what an experience it would be. This project has been going on for three years and I have learned a lot - patience is indeed a virtue. This is Part 1 of a two-part adventure. Since it has been written as the process as evolved, I have interjected failures and solutions. After you read this, you will realize what a bargain you get when you buy a prop.
I first went to my notebooks that I keep old magazine articles in and found an article by Bob Dunham on "How to Mold Filament-Reinforced Props".
Next step was Google where I found a few more - things were looking up. Bill Lee did an article several years ago and Mario A. Ferrero took this and put together an excellent "how to". These are available online and if you are considering making propellers, you should spend time studying these articles. What I have done is take this information and try to apply it to making my own props. Here are some links to web sites that show where the project started. In this article, I show photographs of the process that I go through to make a mold. The photographs show stages for different molds and not one singular taken over the three years.
Bill Lee article on prop molds
Mario Ferrero article on prop molds
Wayne Trivin article on prop molds
If you are interested in the technical side of propellers, Propeller Dynamics by Stuart L. Sherlock is an excellent reference. Another good reference is a July 1980 Scientific American article The Screw Propeller, by E. Eugene Larrabee.
The first problem I ran into was getting the material to cast the molds. The older articles referenced materials; however, these companies have been sold and resold thus a series of dead ends. An article by Winship Models blanks out the source of materials - just what you want on "how to." After a call to Howard Rush, he told me about a company in Kent, Wash., that might have something that would work. A search on the internet brought up a web site. I selected a product with an extremely low shrinkage - .0001 inches. A trip to Kent and $103 later I had a gallon of mold material and a quart of catalyst. I could already see that shiny new $103 prop.

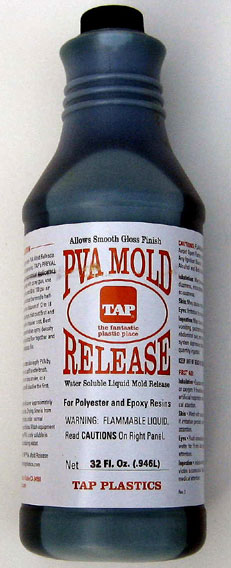
The next trip was to TAP. They are a one-stop shop for all sorts of materials for working with plastics and castings. Here I purchased PVA (liquid mold release), mold release wax, coloring for the resin, and a spray unit for the PVA - total price $32.
This project is starting to get expensive - little did I know how expensive. I cannot wait to see that shinny new $135 prop.
The next challenge was getting the tooling designed and made. The original article I read by Bob Dunham used a piece of music wire for the center shaft. The article by Mario A. Ferrero used a set of mandrels.
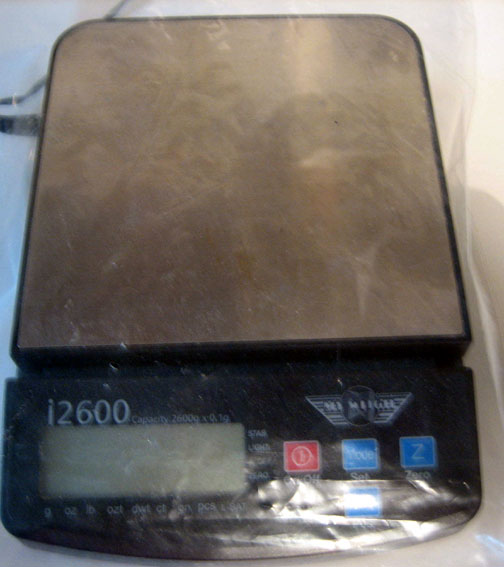
Well, one way to judge a project is by how many new tools you can justify for your workshop. Since I wanted to document this process, I needed a new digital camera. A visit to Amazon and I found the camera that would do exactly what I wanted. Since my wife is a graphic artist, I decided to get her to look at it since she would be using it - BIG MISTAKE. The $300 camera that I had selected did not do all the things that she envisioned she would need. Now I had been down this path before with a VCR camera and a VCR, why did I think this would be any different. We now own a top of the line Cannon with an extra battery and extra memory chip. The camera cost so much the last thing I want to do is to take it into my shop -- back to Amazon. We now have his and hers digital cameras. Cannot wait to see that $1,435 shiny new prop. Next came a sale flyer from Rockler. I had wanted a good band saw to replace the Craftsman bench top. Off to Rockler for a new band saw. Maybe I can wait to see that shinny new $1,945 prop. Well just when I thought I had all the tools I pulled down my trusty old beam balance. Jeff Rein had told me about a new digital scale and I began to think how easy it would be just to put something on a scale and read the numbers. Back to the internet and a brand new digital scale -- $140. The picture is not out of focus; the scale is inside a plastic bag to protect it from drips and drools.
Well its time to make a mold for that $2,085 prop.
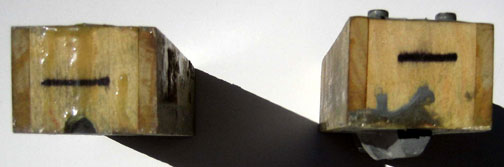
The instructions say make two matching halves. This is easier said than done when you are cutting out pieces of wood. The first attempt, before the new band saw arrived, did not meet the design standard I had set for this project and it wound up in the burn barrel. Wait a minute, it is illegal to own a burn barrel. It wound up in the outdoor vertical fire pit and grill.
With the new band saw in place, I was able to build a matching set that passed inspection. However, I have since solved the matching problem. Build one box and cut it in half. Use the uncut sides to cast the matching surfaces.
A trip to the Home Depot and $4.00 later I had a piece of 1/2 x 3 x 36 poplar, which turned, into a box. Since the box needs to be held together with wood screws, it is time to drill holes. Now my bench top drill press is limited to how deep it can drill. This has been a nuisance and when I went to get the new Jet Band saw, they were having a sale on Drill presses. Just as I was getting ready to eliminate a nuisance, the salesperson said next month that they are coming out with a new model with a laser on it. So here I am faced with a two-step process - just wait until next month. Well it has been three years and I am still using the bench top drill press.
A quick pass through the band saw and two boxes. A pass on the belt sander and back to the drill press to finish the pilot holes. Marking the faces and matching holes will make assembly easier. Well at this point I have two matching boxes - where is that shinny new prop?
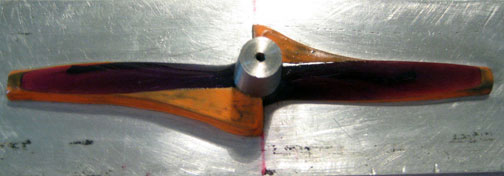
Back to mandrels. This project started out to build an FAI prop and two Half A props. Time to do some drawings. I grabbed the micrometer and the master props I wanted to copy. The first thing to do is measure the diameter to the engine shaft. Next measure the diameter of the prop hub. A phone call to Tony Huber and he said he could make the parts for me. Two weeks and $40 later I had my tooling for my $2,129 prop.
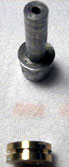
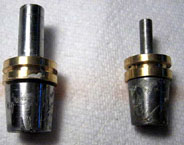
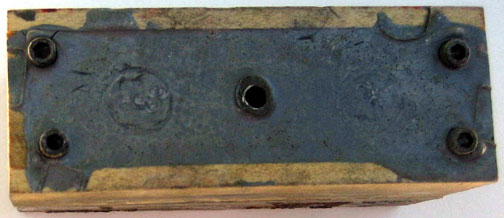
The green tint on some of the tooling is from the PVA. The thimbles were used with the wooden mold boxes. The sides and base plate are part of the new tooling.
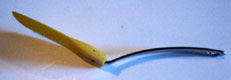
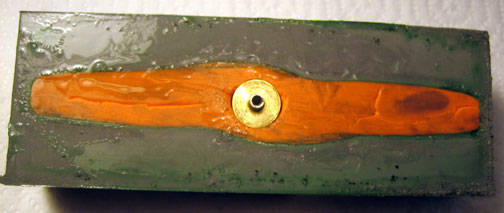
As can be seen the master prop is mounted to the base plate.

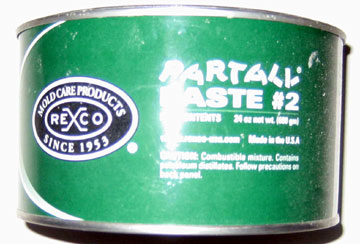
Before you mount the prop, you must put release agent (paste) on the prop; in fact, put release agent anywhere you think the mold material might get. After the prop is mounted, check to see if the hub is square. If it is not, the tips will not be at the same height.
You are going to need some tooling. The first are angle gages to help cut and measure relief angles. An oversized one and one that comes to the top of the prop for final angle.
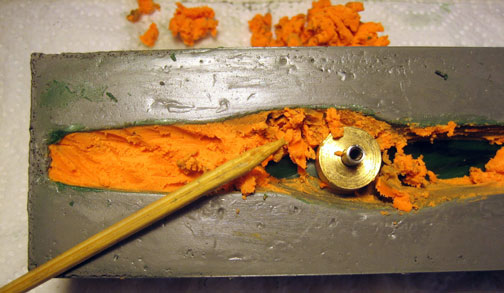
Next step is to pack modeling clay under the prop. Be prepared to spend some time here. This is going to take about several hours to get it the way you want it.
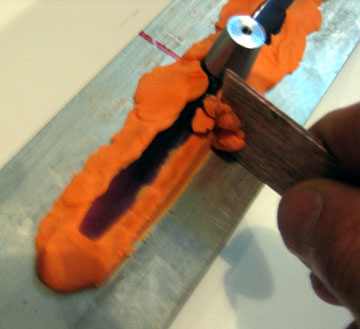

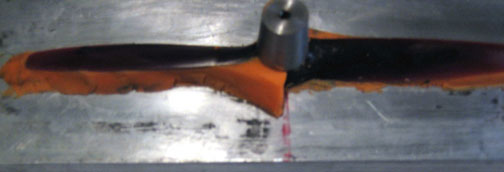
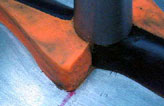
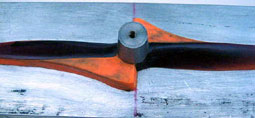
Note the red line is to help locate the part line. I have since scribed the centerline. From the rough clay to the final, you can see how much clay was removed. Set this clay ball aside and use it to seal the sides and ends of the mold frame.

 Once again, in building the clay around the prop if you force
clay under the prop make sure you relieve the stress by pushing the prop
down into the clay and then fill in the edges. If you do not do this when
you remove the clay after casting the mold, the master prop will spring
loose and ruin the mold. I thought of CA'ing the prop back down, but CA
does not stick to mold release. Extending the clay past the tip will provide
support for the tip and alleviate the spring back. The extension will also
allow you to place your tow when you mold a prop. Make sure you build the
extension.
Once again, in building the clay around the prop if you force
clay under the prop make sure you relieve the stress by pushing the prop
down into the clay and then fill in the edges. If you do not do this when
you remove the clay after casting the mold, the master prop will spring
loose and ruin the mold. I thought of CA'ing the prop back down, but CA
does not stick to mold release. Extending the clay past the tip will provide
support for the tip and alleviate the spring back. The extension will also
allow you to place your tow when you mold a prop. Make sure you build the
extension.
Another word about building the clay mound, before building the clay mound take and give the prop a couple of coats of release agent in the area where the clay will be placed. This will protect the prop in case you have a leak in the casting material. Also, take special care in the hub area to build up a good base since this can become very thin and break. The two props I have been trying to mold are very small with thin blades.
I found the most difficult part of building a mold is getting a correct part line at the hub. From the articles and photographs, that I looked at it was difficult to see how the part line was established. None of the articles does an adequate job of capturing this important step and it led to a lot of grief in the first molds that I made. Once I had built a couple of molds, and saw how the mold failed at the hub, I realized the importance of spending effort to get it right.


With the prop mounted and the clay molded to shape, it is now time to spray the PVA over the entire assembly. Initially I used the canned air sprayer made by Preval. This works but not well. I switched to my airbrush. This works fine and because the PVA is water-soluble cleanup is easy. Take your time in getting PVA on the prop and clay assembly. If you are not satisfied with the finish, wet a Q-tip, remove the PVA, and start over. I put mold release wax over the prop then the PVA.
Next, clamp the wood box to the plate/prop assembly. Again, a caution note make sure you put mold release on your clamps. Refer to the Ferro article to see photos of wooden mold boxes.
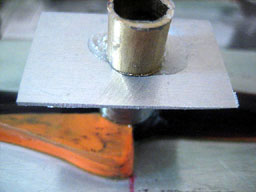
The aluminum plate is added to the top of the mandrel. If you did not put the screw in before you applied the PVA, you will need to clean out the screw holes. Initially I bought 1/8 inch aluminum from the hardware store, but decided to replace my metal yardsticks since they are the same size as the aluminum stock and less expensive and they are already marked. Now with metal in place there is one last step. Place a tube over the screw and CA it in place. Be careful not to get CA on the screw. A better method is to use a larger diameter tube and CA it to the plate and then screw the assembly to the thimble; this is the method I am using. Fill the top of the tube with clay.

Clamp the wood box to the prop assembly and place clay all around the mating surfaces. For the newer tooling, I pack clay at the ends. Refer to the Ferro article to see photos of wooden mold boxes.
Well it is almost time to mix the mold material. The question is how much? Calculate the volume of the mold box, subtract the volume of the filler. Next, subtract the volume of the prop and clay. You do not have to be exact. Now subtract the filler and prop/clay from the box volume. Ignore the metal plate.
 Grab the container you are going to
mix in. A couple of days before you are ready to mix make sure you request
spaghetti for dinner. This will generate the larger cans if you are going
to mix a big batch, otherwise asked for canned soup. Measure the diameter
of the can and calculate the area ( area of circle = pi r squared) Take
this area and divide it into the volume of the box less fillers and prop/clay.
From the bottom of the can, measure this distance and mark it on the tape.
For the FAI mold, it is a little over half way up the can. Next take a clear
plastic bag, one from the produce section of your grocery store, and put
your new digital scale inside it. This will protect the scale from drips.
Place the can on the scale and zero out the can and bag. Get the acetone,
paper towels, pencil, paper, calculator, dipping cans, screwdriver, and
newspapers. Cover your work area with newspapers. Put on your disposable
gloves, open up the resin, and mix it. This stuff is thick. A boat paddle
would work, but it is too big to fit in the can. After talking with a technical
representative I purchased a spatula.
Grab the container you are going to
mix in. A couple of days before you are ready to mix make sure you request
spaghetti for dinner. This will generate the larger cans if you are going
to mix a big batch, otherwise asked for canned soup. Measure the diameter
of the can and calculate the area ( area of circle = pi r squared) Take
this area and divide it into the volume of the box less fillers and prop/clay.
From the bottom of the can, measure this distance and mark it on the tape.
For the FAI mold, it is a little over half way up the can. Next take a clear
plastic bag, one from the produce section of your grocery store, and put
your new digital scale inside it. This will protect the scale from drips.
Place the can on the scale and zero out the can and bag. Get the acetone,
paper towels, pencil, paper, calculator, dipping cans, screwdriver, and
newspapers. Cover your work area with newspapers. Put on your disposable
gloves, open up the resin, and mix it. This stuff is thick. A boat paddle
would work, but it is too big to fit in the can. After talking with a technical
representative I purchased a spatula.
The next trick is getting this stuff out of the gallon can. Remember the spaghetti, make sure tomato paste was involved - this will make a good dipping can. Now fill the mix can to about _ inch below the mark you made on the outside of the can. If you want, go to _ inch. You now have the weight of the resin. The cans make it easy to pour the resin, however a large mouth glass jar works well. Here you see the jar on the scale with the fill line marked. I weigh the container and record the weight. Weighing the container lets you save the batch if you loose power or have a senior moment. Next, zero the container out and fill to below the line.

Another container that works well is a 24-ounce yogurt tub. Since these are tapered you can use the following formula V = h/3(rB2 +rb2 +rBxrb). rB = bottom radius, rb = radius at selected location on container. By the way, this is great yogurt.


Early on when I thought I was on top of the project I mis-read the mix ratio- not once but twice before I figured out the problem. Uncured this stuff has the viscosity somewhere between taffy and a Sugar Daddy sucker. Trying to recover the prop and tooling is and adventure. I took a bucket of toluene and through the whole mess in it. I was able to recover the prop and tooling.
Back to mixing. Divide the weight of epoxy by 100 and multiply by 17 (this is the mix ratio for the Aluminum filled resin, iron resin is 12). This is the amount of catalyst to add. Add this number to the weight of the epoxy and start adding catalyst. Here is where the digital scale is very handy. Once you have the correct weight. A problem I encountered with a F2D mold was soft spots that would not cure. In talking with the technical representative he wanted to know what kind of container I used. He advised me to make sure the sides are scrapped down and to double cup. What this means is to mix and scrape in one container and then pour the mixture into another container. Scrape the first container sides and bottom into the second container and mix thoroughly. Again make sure the sides are blended into the mixture.
Now you are ready to pour into the mold box. Again another learning experience. Take and pour a small amount and flow it over the prop and bottom of the mold plate. Continue this process slowly adding and flowing until the prop is completely submerged. Check your clay seal; make sure you have no leaks. Fill to the top. I found air bubbles on the top but none inside the mold. Take and set this aside and let it cure for a couple of days. Note that this is the iron-filled resin being poured into the new tooling.


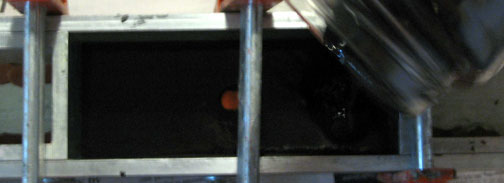

The dark you see in the clay dam is black clay and not a leak.
I cannot emphasize enough making sure you do a good job getting release agent on all surfaces. Even with all these cautions about mold release, I still wound up with the prop not wanting to come out of the male mold. Since the PVA is water soluble, water and Q-tips are used to release the prop at the edge of the mold. Next taking the mold and submerging in water will start to soften the release agent but the real culprit is the hub and the metal bushing. Again release agent, release agent, release agent. The following shows the cured female mold with one side removed.

With the female mold removed, it is time to remove the clay. A wood skewer and Q-tips work well to get the clay off the prop and the mold. Be very careful at the tips.

With the female mold cleaned up, put on a coat of mold release wax and then a coat of PVA. You will need a way of getting the molds apart. Use 1/4 x 20 insert nuts and 1/4 x 20 socket head cap screws. Next use a light drop of CA on the 1/4 x 20 insert nuts to hold them to the mold. Insert Photo 2421 Give the mold a good coating of PVA. Take the 1/4 x 20 bolts and cover the thread with mold release wax and thread them into the insert nuts until you get contact with the mold. Remove the wax that will come off when you thread the screws. Next CA an access tube to the bushing and place the bushing over the spindle.


Well this process has produced three molds The following photos show a Half A mold made using the wooden box and Aluminum filled resin.


After messing with wooden form boxes, I decided to upgrade my tooling to a more flexible system. Secondly, I am trying to eliminate some of the problems I encountered with the molds in the hub area. Liberally borrowing from Mike Hazel's tooling, I got Tony to fabricate some new mandrels and flexible tooling. A problem I encountered with the Half A Mandrels was aluminum shafts could not standup to the forces to get them out of the molds.
The first mold half I made with the new tooling had a problem. The tooling worked great. The problem was with the molding material. It was toward the end of the gallon, and although I thought I did a good job mixing, there wound up being a soft spot that did not cure. Yes, it was in a critical area and could not be repaired. Since I had the problem the iron-filled material toward the end of the gallon, the problem was not with the material but with the mixing technique.
You may wonder as I am why is he doing this? It has gotten personal.
The second mold first half came out without major problems. There were some small undercuts. These were sanded out.
The third mold came out acceptable. When I was releasing the two halves by turning down the SHCS one of the corners cracked. On the next mold that I built, I decided to remove the screws and relieve the holes down to the insert. There still was a problem with cracking at one hole. CA and clamping in the vise solved the problem.
After making 10 props on the first mold, it cracked as I was removing the prop. I was able to CA the crack. A piece of mold broke away. I took JB Weld and filled in the void and sanded to shape.
After a period of time, I decided to make molds for a different group of props. After all, I have mastered the art of mold making. A trip to Kent and I had a new gallon of resin and catalyst.
A half-gallon of resin later and I have two molds. I have continued to search for a different mold epoxy. I found a supplier on line and he sent a sample. Having just finished claying up a half a prop I decided to give it a try. This was a bad mistake. This stuff did not work. A few days later, the salesman who sent the sample called. Obviously, he was expecting a big order. When he asked how it worked, I told him. He said he would get back to me. I am still waiting for the call.
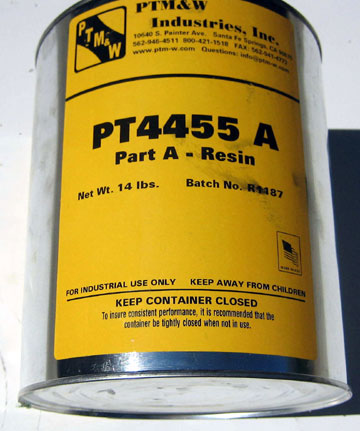
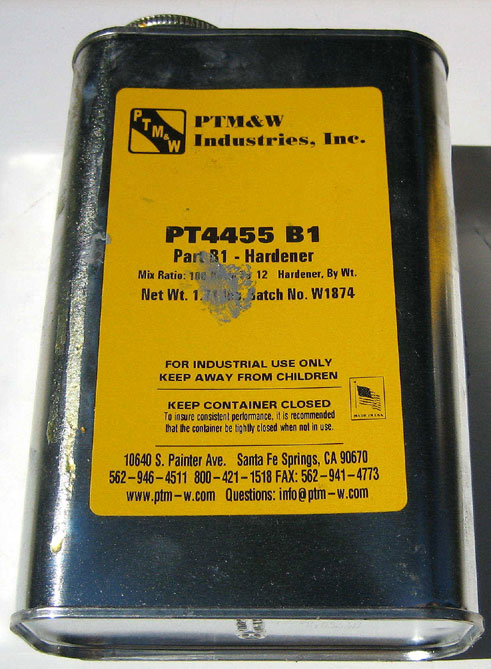
While waiting I decided to do some research and found a new material. This is made by PTM&W Industries; phone number is 1-800-421-1518.
One of the early mold failures involved the prop becoming loose in the female mold. This occurred at the tip and I assumed it was because I packed too much clay under the tip thereby causing it to come loose when I removed the clay. Taking extra care to prevent this from ruining another mold, I was surprised to see it happen again after applying PVA. I decided to hold it in place with CA. Q-tips and water removed the PVA and allowed me to wick CA into the affected area. You are probably thinking he just CA'd the prop to the mold forever. Once you pour the male half of the mold, you can now retrieve the pop. Get out your full strength nitromethane and Q-tips. You see nitromethane will dissolve CA. Once the prop starts to wiggle, time to floss. I used spider wire because of its small diameter and strength. You might try dental floss. It has a bigger diameter and is not as strong.
Since I am in the final stages of writing this article, I have been documenting and making a new Half A mold. When I poured the male half I noticed, I had not fully immersed the 1/4 x 20 insert nuts. After waiting three days to pull the mold apart, I noticed that it was bending. BENDING is not a good thing. The mold was too thin and not fully cured. Fortunately, the female half was good and the master prop was still in place.
I prepared the mold and poured again. When I separated the two halves, the prop was stuck to the male half. Using an Xacto, and being careful not to damage the mold I released the tip of the prop. Next I took Spyder wire and flossed. This was repeated for the other tip and the prop broke free.
The following summarize the steps to make a mold.
Step 1 Place Partall on prop
Step 2 Mark centerline on base plate
Step 3 Place Partall on base plate
Step 4 Mount prop to plate
Step 5 Rough application of clay
Step 6 Final shaping of clay
Step 7 Apply PVA to forms and prop
Step 8 Drill hole in aluminum and CA tube to aluminum plate
Step 9 Attach aluminum with tube to thimble
Step 10 Attach sides and ends to base plate
Step 11 Apply clay dams at ends
Step 12 Check that no dust or dirt have gotten on prop
Step 13 Mix Resin
Step 14 Carefully pour resin
Step 15 Wait until you are sure the mold has cured and then wait another day
Step 16 Remove clay dam from ends
Step 17 Remove Sides
Step 18 Remove Ends
Step 19 Unbolt and remove mold from base
Step 20 Remove clay (Use stick and Q-Tips)
Step 21 Check mold and sand rough or under cuts
Step 22 Clean dust from mold
Step 23 Apply Partall to prop and mold including mold sides and ends
Step 24 Apply PVA to mold
Step 25 Install _ X 20 inserts
Step 26 Apply PVA to mold
Step 27 Apply PVA to all tooling
Step 28 CA tube to washer
Step 29 Clean spindle shaft and install washer with tube
Step 30 Apply clamps
Step 31 Mix resin
Step 30 Carefully pour resin
Step 31 Wait until you are sure the mold has cured and then wait another day
Step 32 While the mold is still soft (after 24 hours) gently back out the 1/4x 20 SHCS about two turns. If the material is moving stop. You want the material to be firm enough to allow movement.
Step 33 Take the cured mold and tooling and place in a bucket of warm water and let it soak
Step 34 Remove the clay dams, sides and ends. Mark the matching sides on the mold halves.
Step 35 SLOWLY advance the SHCS to release the mold halves. You may want to soak.
Step 36 With the two halves separated, continue to work the mold halves apart
This page was upated Nov. 16, 2009