![]()
A View from Broadway
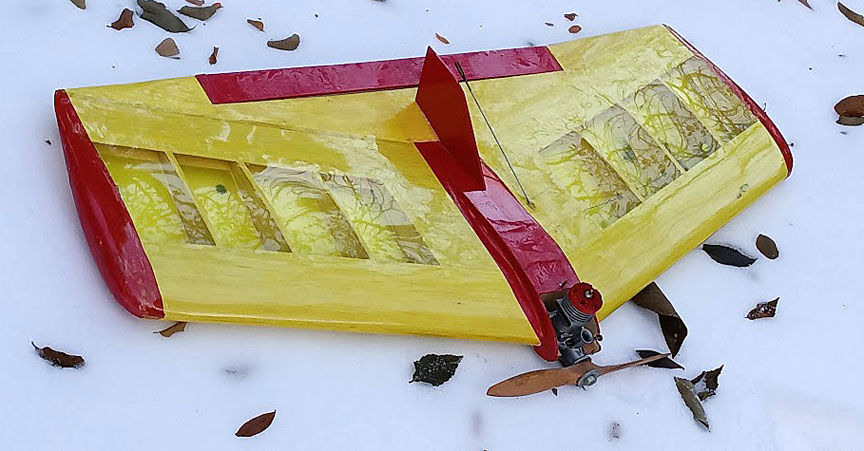
Wow! The finished Wow is a Vintage Combat beauty. All photos by Ken Burdick
Infatuation with the Wow
By Ken Burdick
November 2022
Yes Folks, it’s true.
WOW the first: “What a cool looking old wing!"
WOW the second: “This thing can’t be 'built like this!”
WOW the third: "Holy smoke, this things a lumber yard!”
One of my all-time favorite Vintage Combat wings is the old 1950s Consolidated WOW!
I was discussing it with Greg Davis, who built one from plans many years ago. It has a stunt finish and flies every bit as well as a good Voodoo. The stock model will not, but with a decent airfoil there is no reason yours can’t do the same. I did buy a kit from Blue Sky Models some years ago when we first began Combat Graffiti. It was laser cut so assembly was pretty good; the wood, however was PA quality and while very light, it was quite weak. The airfoil was the very pointy and thin original too. It got hit and instantly turned into a big of dust.
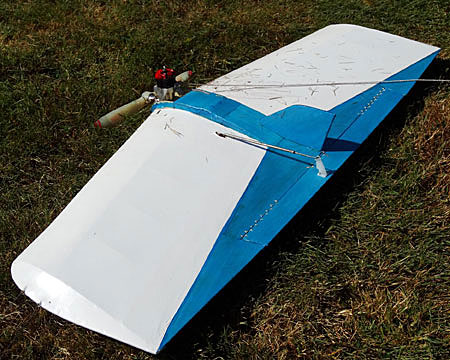
Wow No. 1, from back in the day.
Boring stuff!
As a rule, I don’t like writing construction articles. They get bogged down in detail and can become quite boring to most readers. I have gotten some feedback on the WOW I built, and since there are no kits that I know of any longer, here is how I built mine. It is a repeatable process once the templates and jig are built.
Determined to build a better version of the good-looking model, I sent away to Bob Mears plan service (Barry Baxter’s old site) for a set of full-size plans. The plan-set arrived PDQ and I carefully cut out the ribs and other parts that I would make templates from. The ribs I used were modified greatly and are similar to what is used in Combat today. I use 1/16 ply for templates and spray adhesive to attach the paper image to it. They are bandsaw cut and sanded from there. The original kit has a 1/16 x 2” piece of balsa that slots into the ribs at the front. I opted to replace this with a 3/8” square balsa stick turned on point and made a V notch in the rib patterns for it.
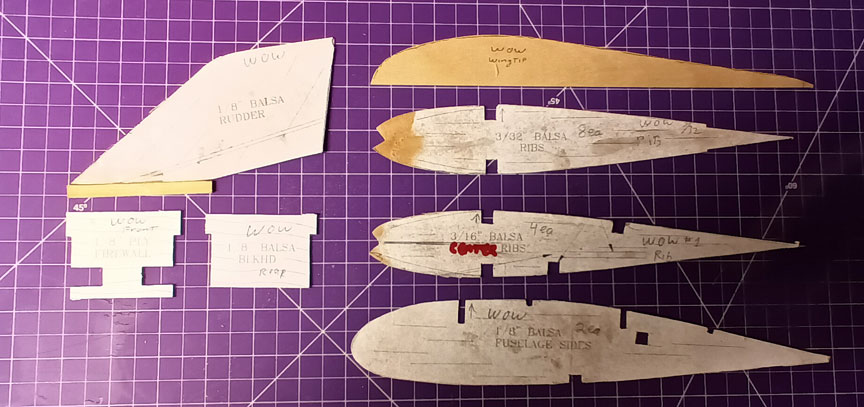
The templates.
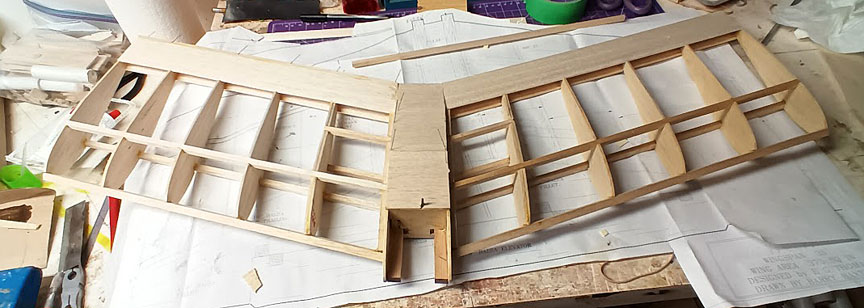
I remember struggling with warps from the first Wow I built, so this time I built a assembly jig for the wings. This is a good idea as the steep angle of the wings really makes it difficult to get alignment right on this thing. I used a flat ¾” pine board (shelf wood), I had and laid carbon paper over it. Next I taped the plans to it and using a straight edge drew the spar angles into it. The image transferred well and I could then draw a full width spar onto the board. I used scrap pieces to create a slot that the wing spars could then be dropped in and held at the correct angle. This created the fundamental shape and alignment for the wing. As long as the ribs were straight all would be well. The rib spacing was measured and lines drawn on the jig. A dozen or so 1” x 2” x 3” pieces of pine were attached on the lines so the ribs could butt up against them. Lastly was a 3/4“ piece of 1” x 2” pine ripped to 1” and this would support the ribs in the back so as to keep them in a lever position as the glue dried. They are clamped to the blocks keeping them at the correct angle to the wing spars. Next I installed the top wing spar, then the top piece of the trailing edge. Once this was all firmly glued, I took it out of the jig and installed the bottom half of the trailing edge and the leading edge.
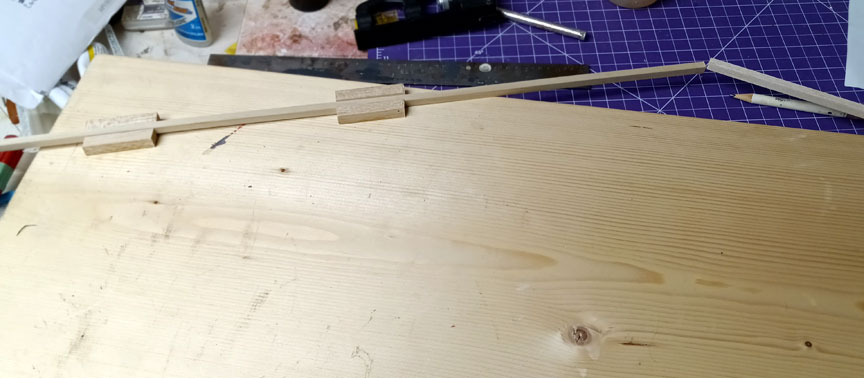

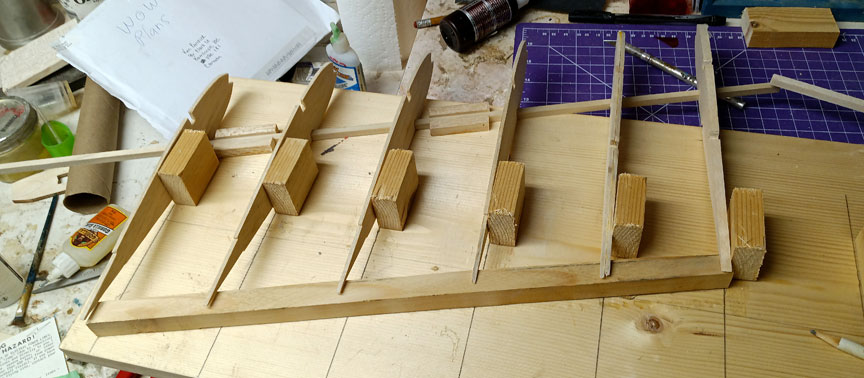
Three views of the jig.
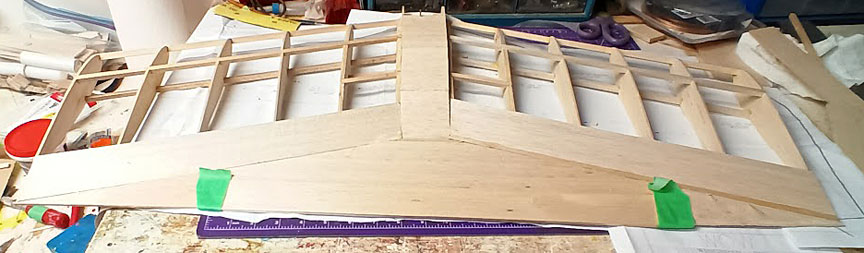
The Wow uses a box to hold the engine mounts and fuel tank; this I made into a separate assembly.
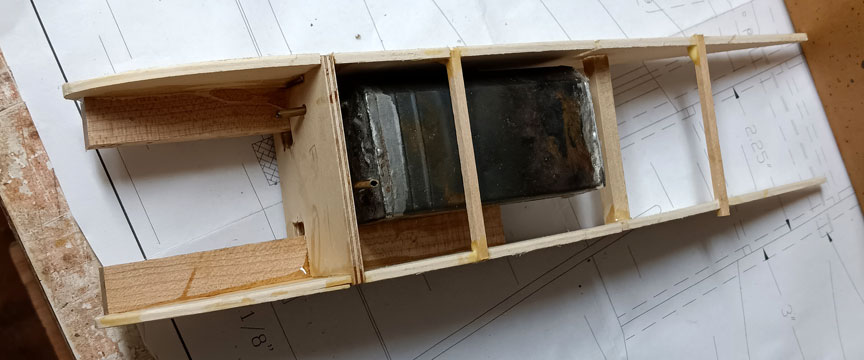
The engine box.
The airfoil-shaped box is supposed to be made from 1/8” balsa which should be fine, but I used 1/8” lite ply on mine. The box is notched for the wing spars. Care must be taken when assembling the wing halves to it. If the ribs are not at 90 deg, you might introduce a dihedral on one or both wing panels. (Ask me how I know.)
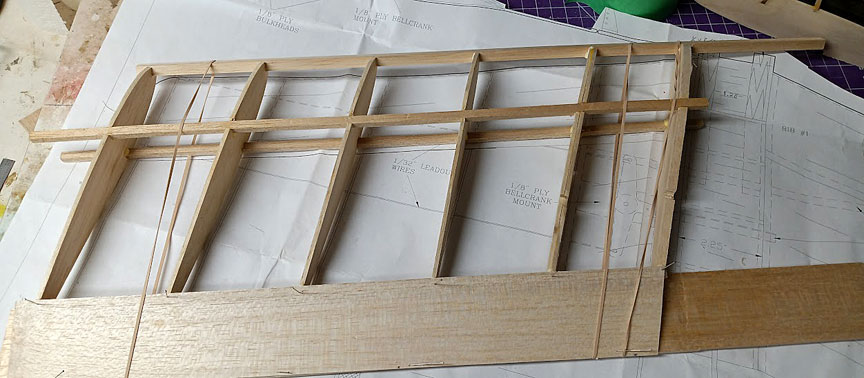
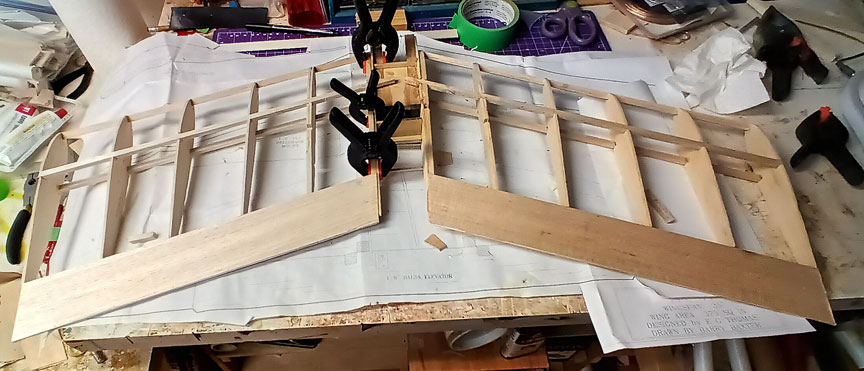
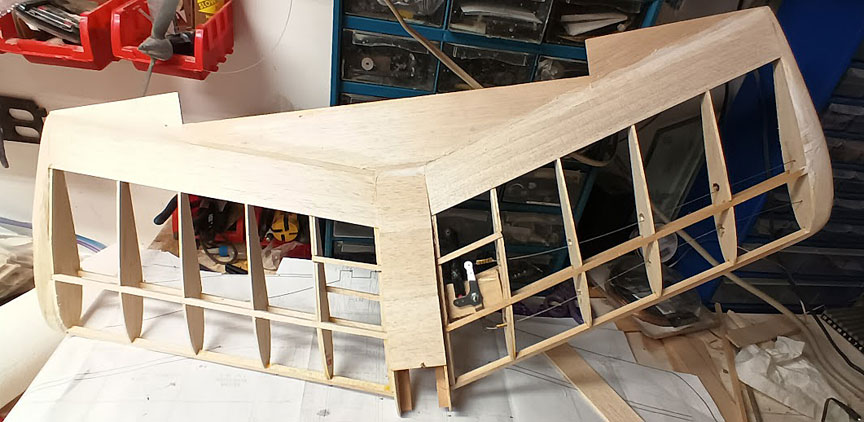
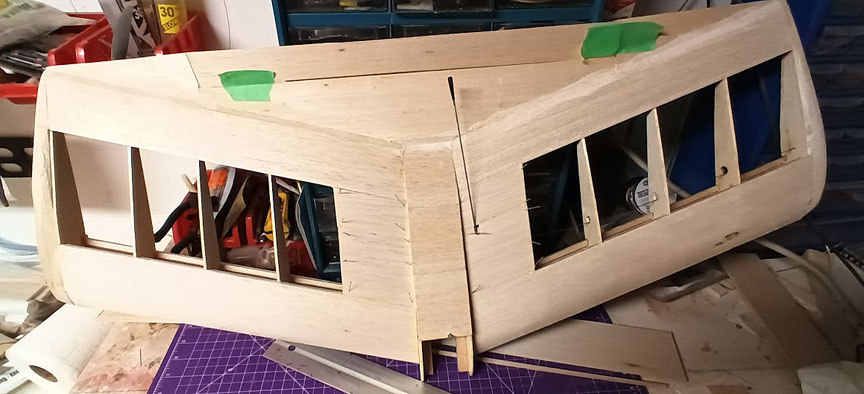
Attach both wing panels to the box. You now should have a straight wing that forms the fundamentals of the design.
This thing s a pain in the rear to build, so if you’re not up to it then save the many difficulties of completing this model and go make a Voodoo, but if you have the patience, this old wing will be a keepsake.
I’ll include as many pictures as possible since they are self-explanatory. The finish work on mine was Hobby King yellow translucent film. The red trim is Monokote. The wingtips on my model are carved balsa block, but the standard wingtips will work just fine. The engine is a 1958 Fox Rocket redhead. I would suggest a more modern engine than the old balky Fox, anything from a good .25 to a .40 sport engine.
Enjoy the building time.
-- Kennyb
Construction photos


Back to Bod Busters main page
Back to Racing main page
Flying Lines home page
This page was upated Nov. 22, 2022